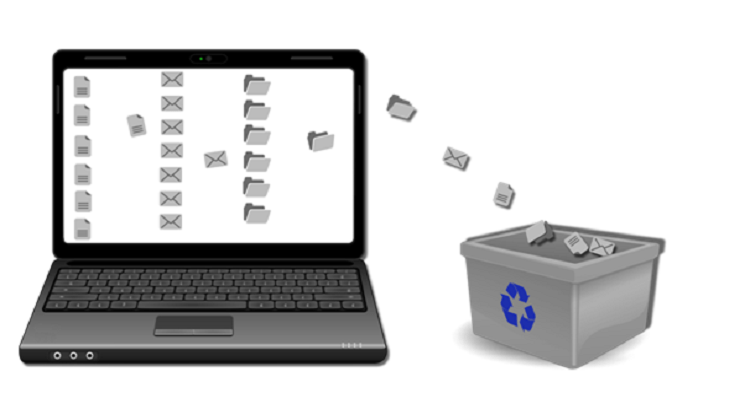
One of main reasons why you want to wipe a laptop is when you’re selling or giving the laptop. You want to wipe the laptop clean to prevent your sensitive data from being used for personal gain.
The longer the laptop was in your possession, the likelihood that it holds highly revealing data about you increases. If the laptop is going to be a gift to a trusted friend, data could end up if it’s mishandled.
Back up important data
Before using any back up management utilities, the first thing you must do is to ensure all of your files and folders are backed up and organized, so you don’t wipe anything that you may need at a later date. Even if you don’t think you’ll ever access the data in future, you may need to reference something hidden away in archives in the distant future.
There are a few ways of doing this and the most practical for you will depend on how much data you need to copy. If you are backing up files selectively, or there aren’t many of them and you have a fairly good internet connection, then backing up to the cloud is an option.
The most complete and quickest way, however, is to back up to an external hard drive that’s directly connected to the laptop.
You will need to figure out how much storage you need. If everything is stored on one drive (usually the C: drive in Windows), right-click on the drive icon to see how much data is taking up space there.
Once you have connected the external drive to the laptop you want to wipe, you can check that it is big enough to store all the data you need.
To backup, you can simply connect an external drive to the laptop and drag files and folders to it. You can use the Windows Backup(opens in new tab) feature in Windows 7, or File History in Windows 8. Windows 10 has both features and adds the ability to back up and restore system images
How to wipe a Windows 7/Vista/XP laptop
Let’s start with the oldest OS versions you’re likely to encounter. Wiping a laptop running Windows 7 shouldn’t be too difficult. Although the legacy OS is now obsolete, you might still run into older devices with the OS still installed.
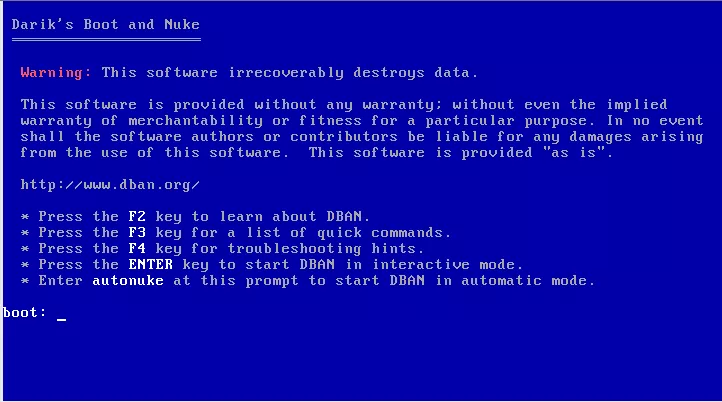
You can use an application such as DBAN. It’s downloadable as an ISO image but you will need to extract it onto a bootable USB or disc in order to use it as a boot device.
Once this USB flash drive is inserted in the laptop you want to wipe, restart the machine and then boot from this drive from the BIOS screen. From here you simply follow the prompts and wait for the machine to work through the reset process, which will securely delete everything. If the machine is going to see new use, you can then reinstall Windows 7 from any disc or bootable USB stick with Windows installation files, although you’ll likely want to upgrade this to Windows 10.
DBAN can also be used to wipe any drive running Windows or indeed Linux, as it doesn’t need to run in any particular OS.
How to wipe a Windows 8/8.1 laptop
It’s much easier to wipe a hard drive in Windows 8 or 8.1. Head to the Start screen, find the Charms bar, click on Settings and then hit Change PC settings. Finally, choose Remove Everything and Reinstall Windows.
When you choose to erase data make sure you click on the “thoroughly” option. This ensures that everything is deleted.
How to wipe a Windows 10 or Windows 11 laptop
On Windows 10 or Windows 11, Microsoft has once again made it easy for users to wipe a hard drive. Although the method hasn’t changed much since the release of the latest generation of Microsoft’s flagship generation, there are a few differences that you might want to keep in mind.
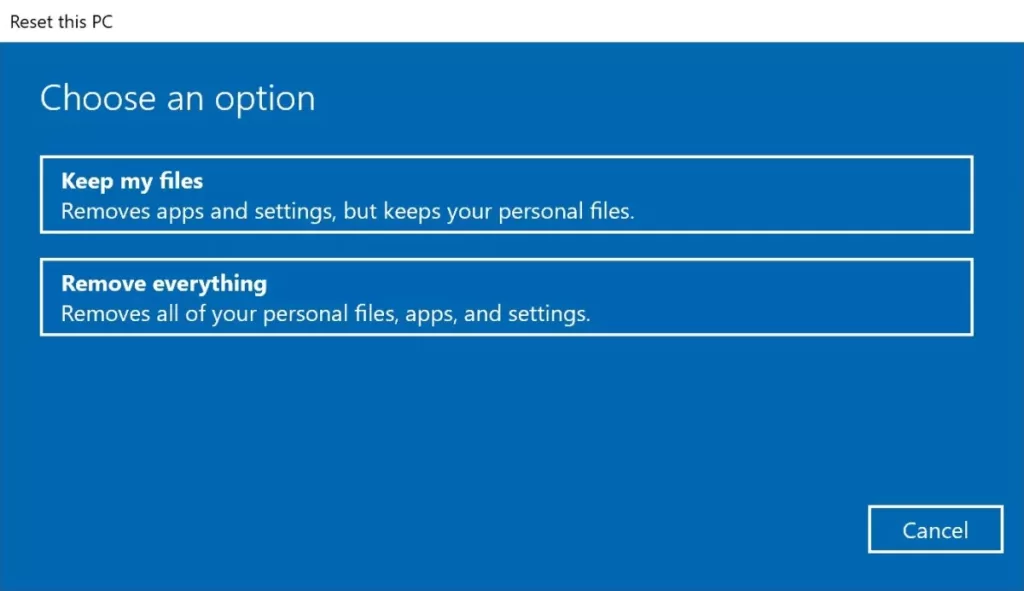
If your laptop is powered by Windows 10, the first thing you’ll want to do is click on the Start button and head to the following: Settings>Update & Security>Recovery.
Once in Recovery, click on Get Started and select whichever options you want to apply. If you’re looking to restore your device back to its original, pristine state, select the Remove Everything option that will, as described, clear your hard drive from all your programmes and files. In the case of two or more hard drives, you’ll have to clarify whether you’re looking to clear all of them, some of them, or only one.
Wiping your Windows 10-powered laptop can be considered one of the easiest processes out there, as it allows you to simply follow a clearly-defined set of instructions that you can read next to whichever Recovery option you wish to select. However, bear in mind that wiping the drives entirely is likely to take a few hours, so plan accordingly. Although an inconveniently lengthy process, this will ensure that all your files are completely erased and your privacy is fully protected.
If you’re one of the 1.44% of users who have upgraded to Windows 11 since it was released to the general public in October 2021, you might have noticed that the process of wiping your drive has somewhat changed with the latest iteration of the popular operating system. However, the difference is minimal.
As in the case of Windows 10, click on the Start button and head to Settings. Then, instead of going to Update & Security and then Recovery, the process is as follows: Settings>Windows Update>Advanced Options>Recovery. From then on, the process is largely the same.